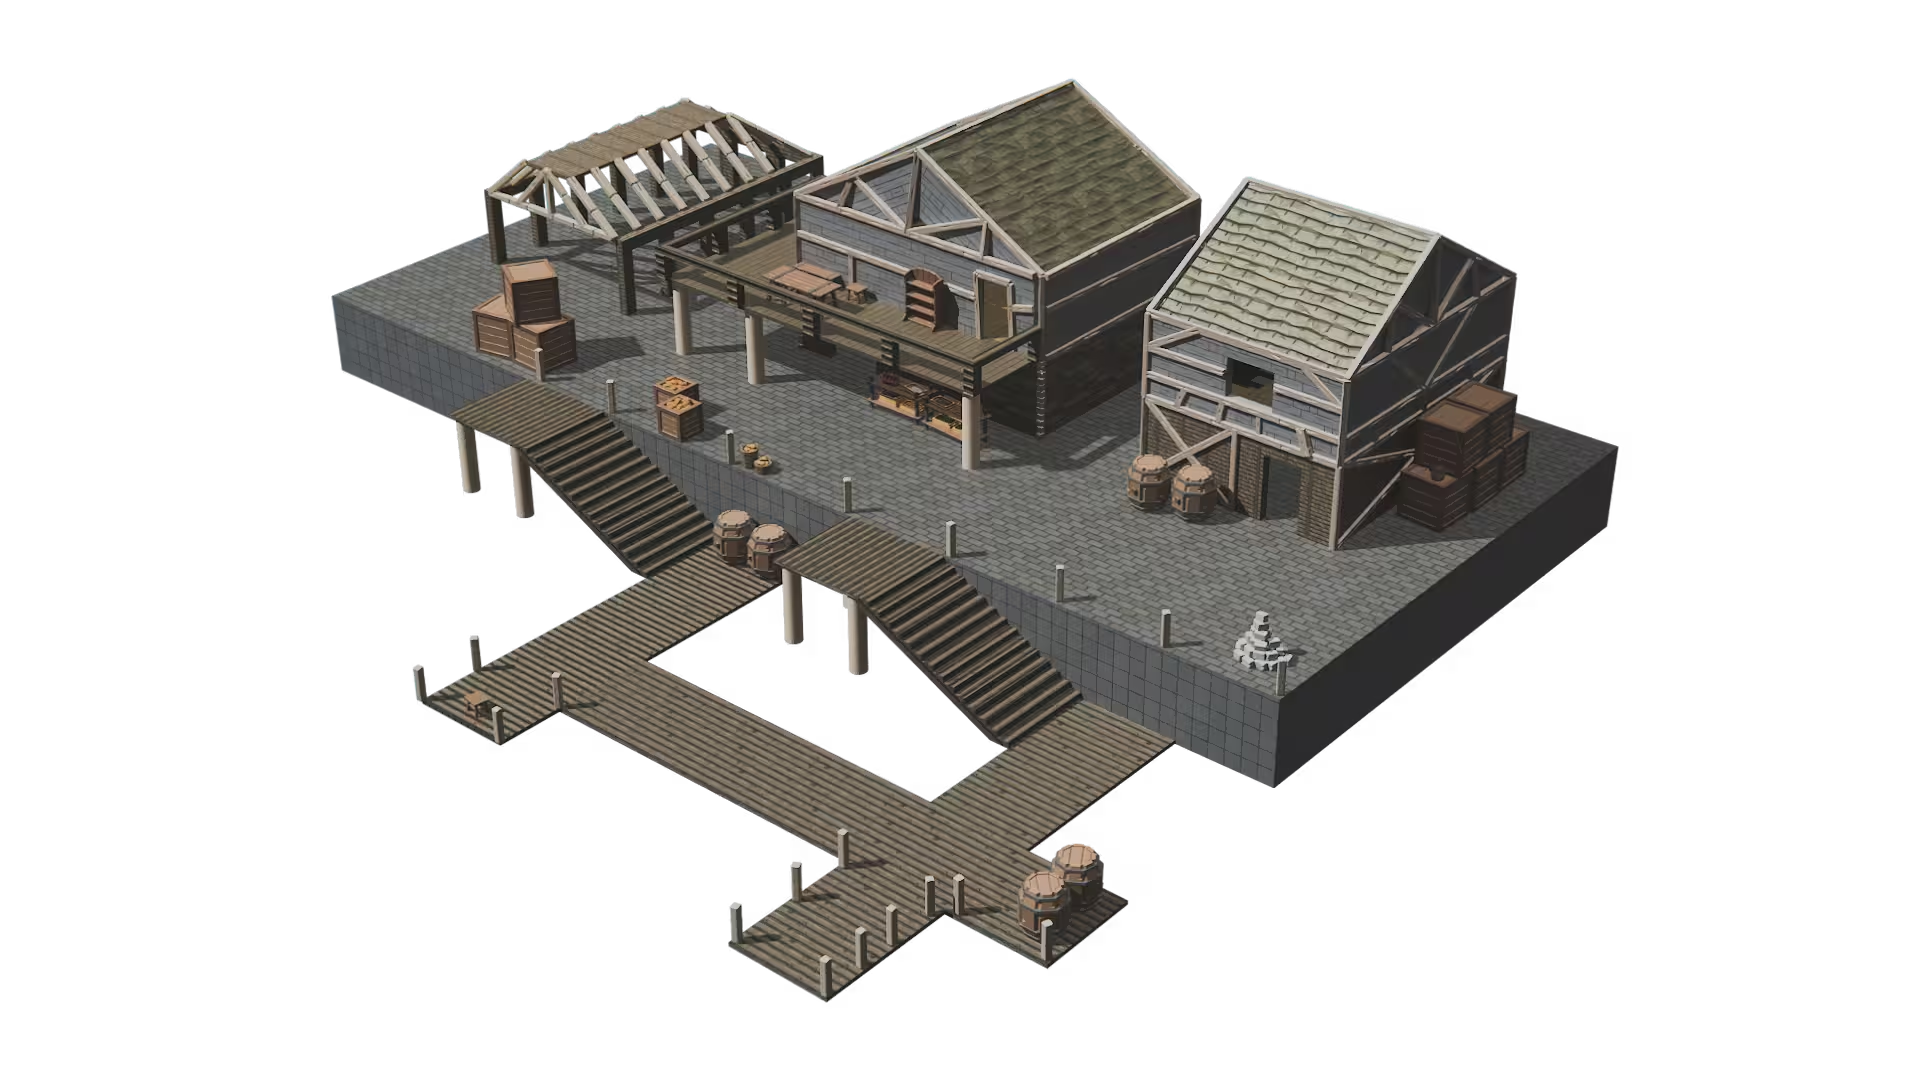
Interface
Get familiar with the Cygon workspace layout, toolbars, and panel functions designed to maximize your efficiency and accelerate your 3D optimization tasks.
Welcome to the Cygon interface guide. This document provides a comprehensive overview of the editor's user interface, core components, and interaction models designed for high-performance FPS map metrics and level layout.
Main Workspace Breakdown
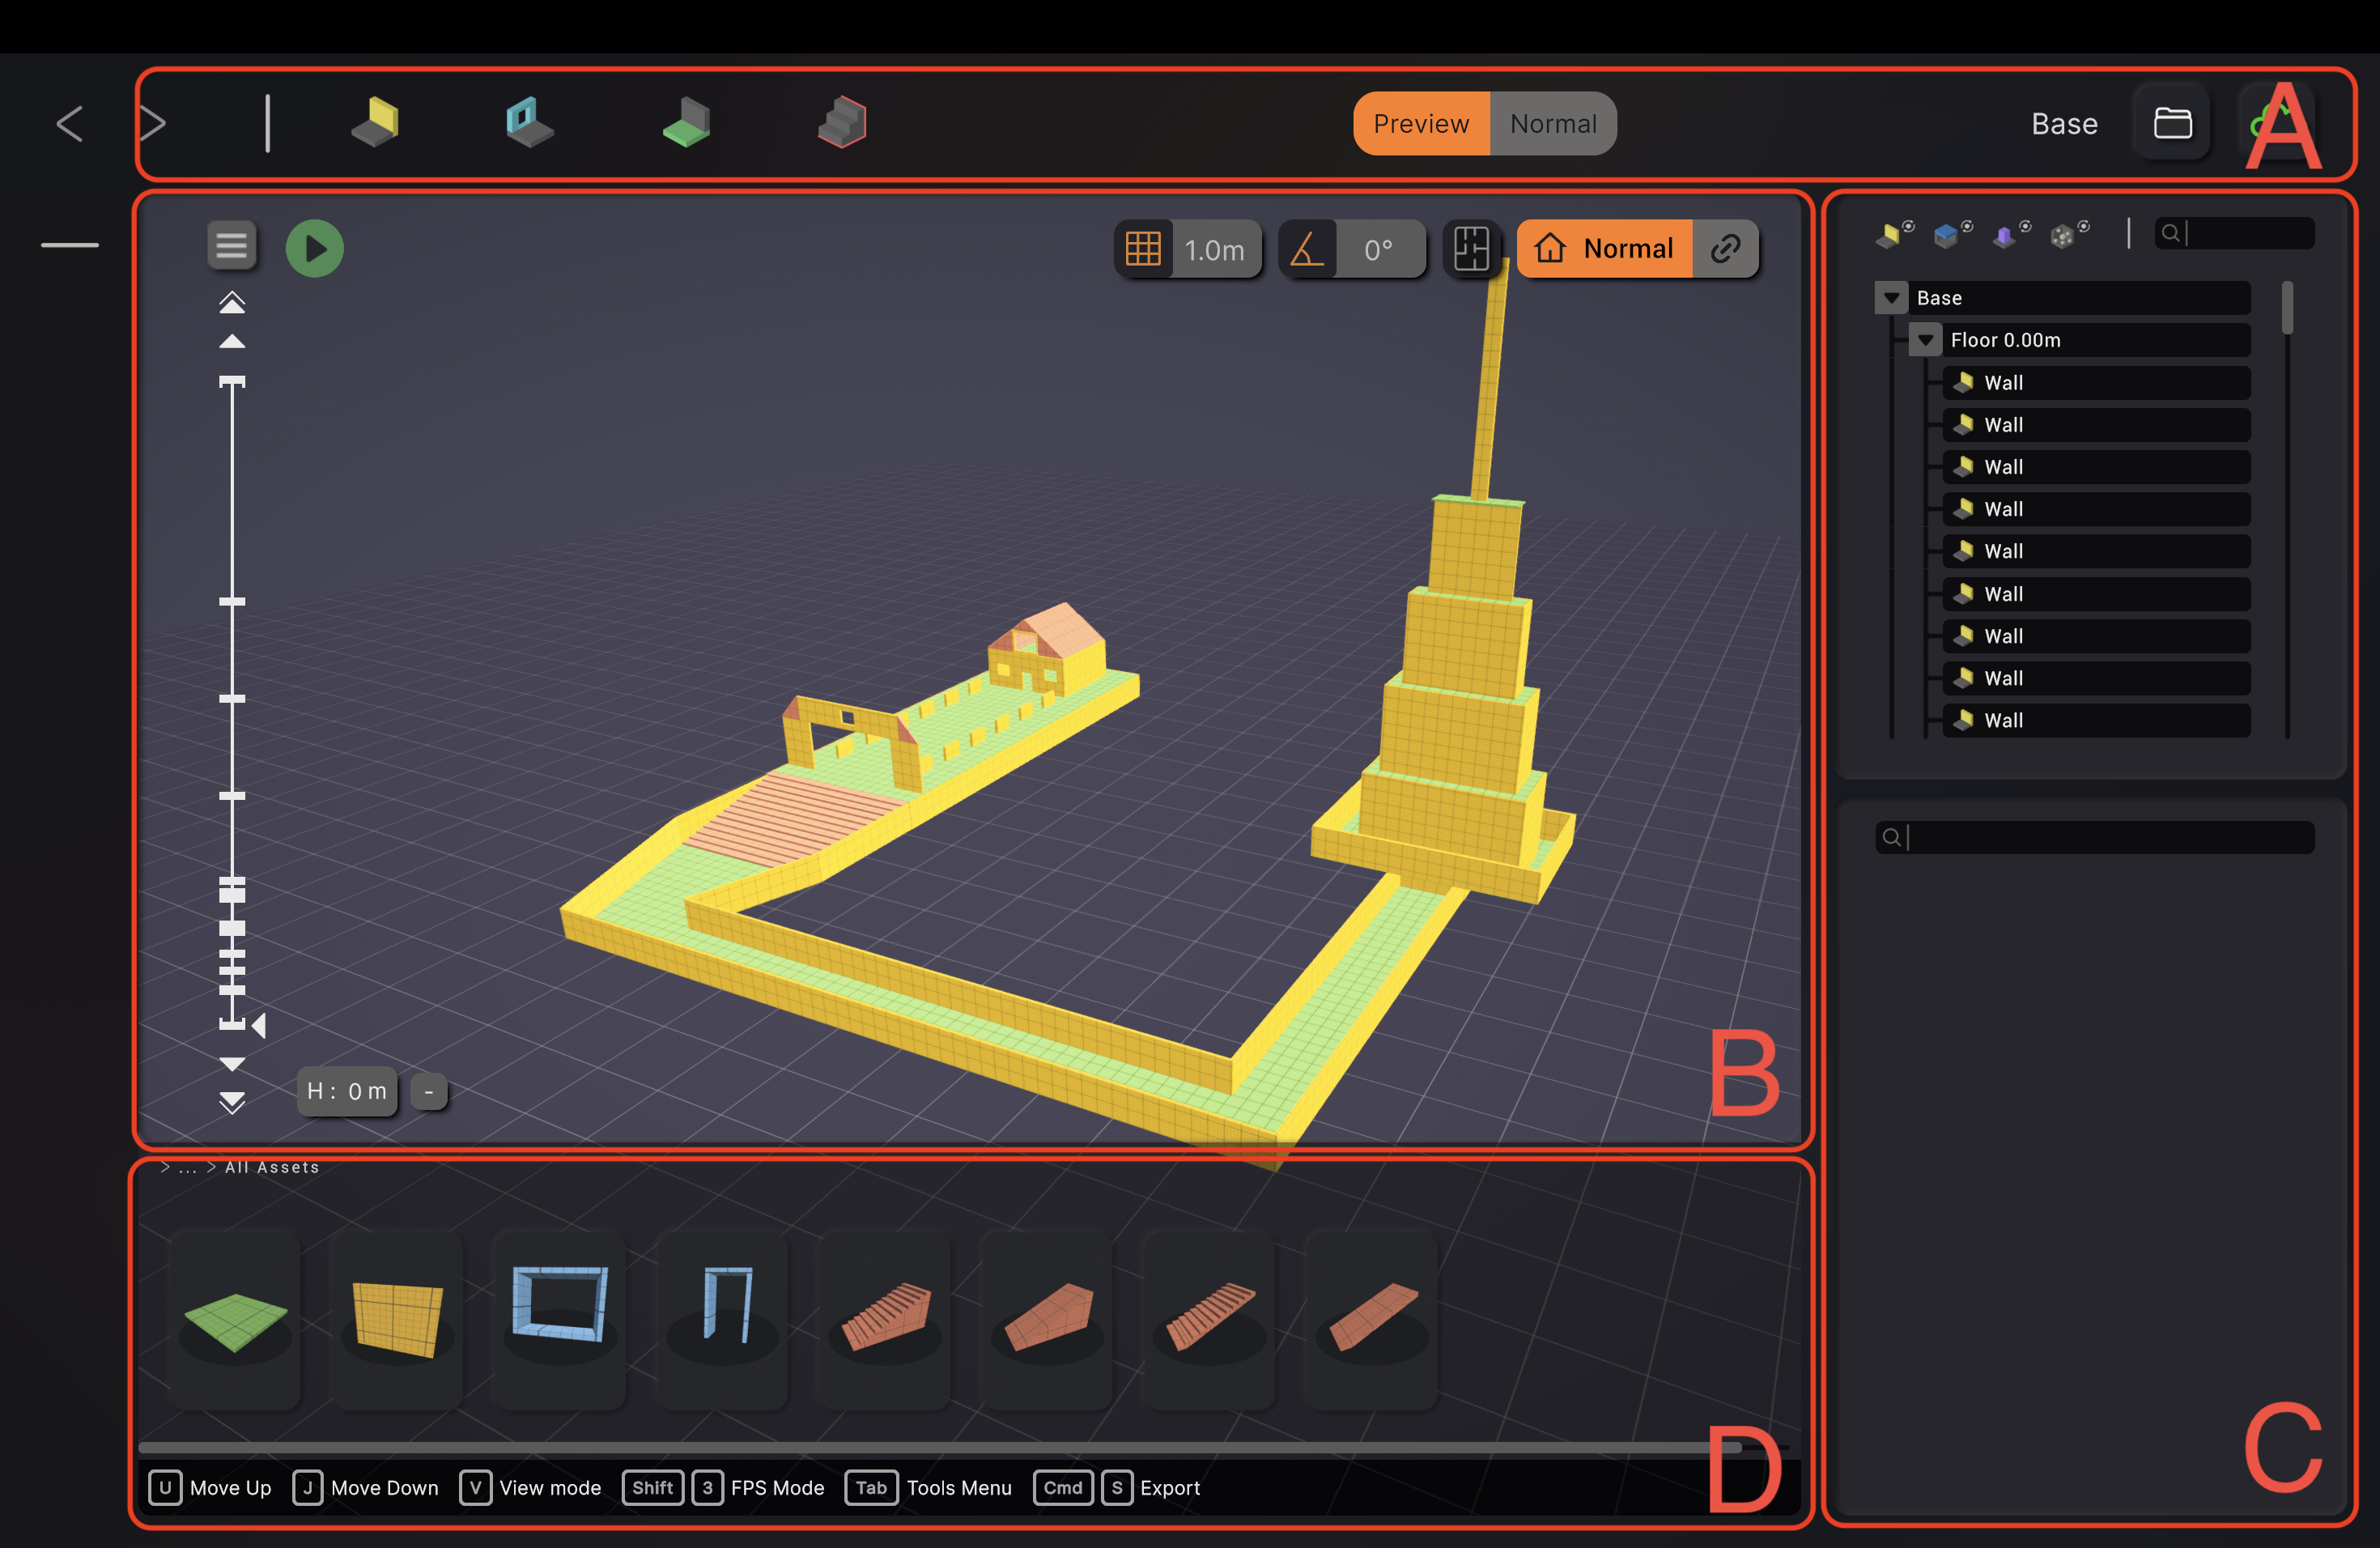
The Cygon editor is divided into four main functional areas designed to optimize your level design workflow:
A. Top Control Bar
Located at the very top of the application, this bar houses global project operations and quick-access toggles:
- Navigation & File Management: Includes undo/redo arrows (< >), the current level name (NewLevel), and a folder icon for project management.
- Tool Mode Selector: Quick icons to switch between building block categories (Floors, Walls, Openings, Stairs).
B. The Viewport (3D Canvas)
The central zone where you build and analyze your map metrics:
- Active Floor Grid: Features a dynamic green grid overlay representing the current editing plane.
- Height Manager (Left Side): A vertical axis widget that allows precision height adjustment (H: 0m) to navigate through multi-story layouts.
- Contextual Overlays: Floating action buttons for viewport settings, including grid sizing (e.g., 1.0m) and angle grid sizing (e.g., 0°).
C. Right-Side Panels
Hierarchy / Scene Tree (Top Right): Displays the structural layout of your level (e.g., Floor 0.00m containing individual Wall entities) with visibility and locking toggles.
Asset / Inspector Panel (Bottom Right): Dedicated area for searching and tweaking properties or filtering contextual items via a dedicated search bar.
D. Bottom Asset Shelf & Shortcuts
Asset Carousel: Quick-access tray hosting block archetypes (floors, walls, pillars, window frames, door frames, and various stair inclinations).
Hotkey Status Bar: Live status indicators displaying vital editing shortcuts:
- U Move Up | J Move Down | V View mode | Shift + 3 FPS Mode | Tab Tools Menu
Hierarchy Naviguation Guide
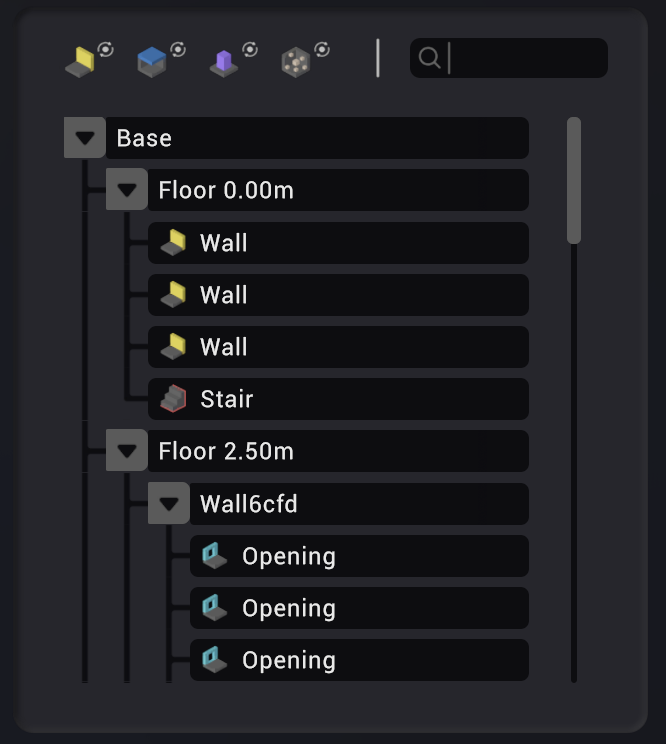
Bidirectional Sync:
- To Scene: Clicking any element in the hierarchy instantly selects the corresponding object in your 3D workspace.
- To Hierarchy: Selecting an object (like a wall) directly in the viewport will automatically highlight the associated item in the hierarchy, making it a breeze to find your way around complex projects as shown in image_cfe7e1.png.
Tree Structure Visualization:
- Elements are organized in a parent/child structure (e.g., NewLevel > Floor > Wall1).
- Use the drop-down arrows (▼) to expand or collapse groups for a cleaner workspace.
Quick Search:
- Use the search bar at the top to filter through your elements and find exactly what you need without getting lost in the weeds.
Advanced Selection & Interaction
When manipulating geometry in the viewport, precision handling is key for accurate blockout metrics.
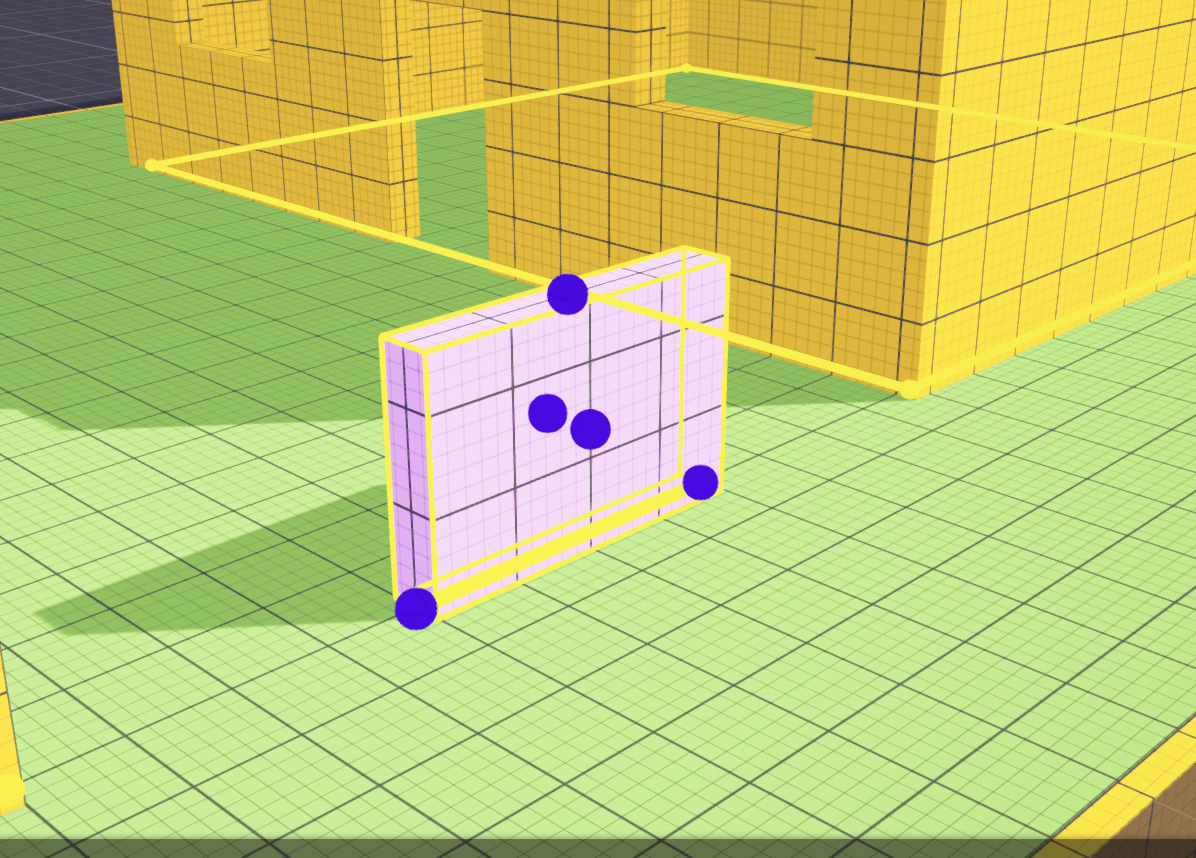
- Active Selection Mesh: Selected geometry features a distinct pink tint with a yellow bounding outline to highlight it in 3D space.
- Interactive Handles: Purple spherical gizmos appear on the vertices and faces of the active block, allowing for precise directional scaling and vertex manipulation.
- Alignment Guides: Yellow base indicators project onto the floor grid to assist with wall snapping, orientation tracking, and parallel alignment against other blocks.
Contextual UI Elements
Tools Pie Menu
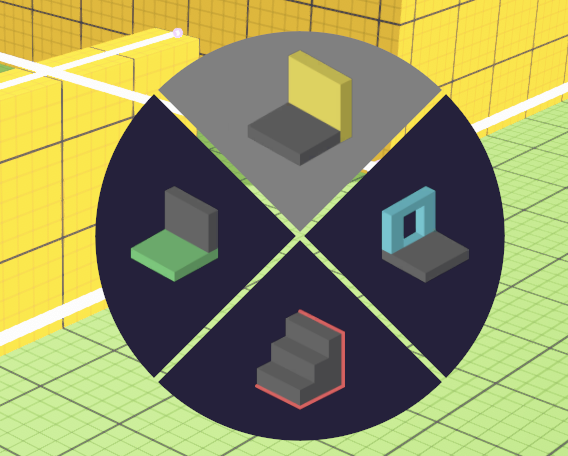
To keep the viewport clean and speed up asset deployment, pressing Tab opens the contextual radial menu. This wheel allows rapid switching between core construction archetypes:
- North: Wall placement mode (Yellow)
- East: Structural openings/frames (Blue)
- South: Staircase geometry (Red)
- West: Floor plate generation (Green)
Start building your next environment today
No credit card. No time limit. Your first blockout is 30 minutes away.